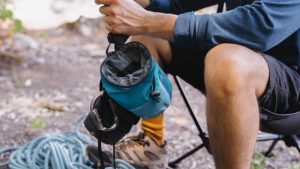
Yes, hands and feet are the most active body parts in the sport of climbing, and hands lose traction as they start moistening after climbing for a certain while. And you cannot wait for the wet palms to dry. So, the smart and rapid rescue is a coat of chalk across the palm and, between the fingers, the source of the moisture.
This is why climbers ensure a chalk bag full of chalk flour attached to their waist belt while climbing. You can buy one from the store, but many climbers make a DIY chalk bag. I know you are tempted to try it yourself and wonder how to make a chalk bag.
Read on to master the craft to design your chalk bag. Not to wonder, this guide can help you come out with the best chalk bag to rival the black diamond chalk bag and other big names.
How to Make a Chalk Bag: Making A DIY Chalk Bag
Making a chalk bag by yourself is not that tough, at least not tougher than climbing. But learning the craft successfully requires you to follow an expert and designed process. Here you go with the decisive steps to make one after your preferred chalk bag DIY pattern or a chalk bag pattern free.
Before action, arrange the essential materials and equipment. Below you go.
Outer Fabric: The most popular outer fabrics for the climbing bag are denim and canvas. These materials are sturdy and resist dirt and moisture, making them a great choice for the outer fabric. Corduroy is also a preferable material for climbing chalk bags and chalk bag bouldering because it is soft and comfortable to touch on top of being durable.
So, arrange any of the mentioned fabrics and take an 8″*14″ piece for the body proper of the bag and 6″ diameter piece for the bottom.
Inner Fabric: A climbing chalk bag’s inner fabric must be soft and soft fleece or woolen lining is the most preferred option here. This is because the said fabric will not scratch or irritate the skin while being worn. In fact, fleece is the most popular inner layer material for a DIY chalk bag.
Now, the inner layer should snugly fit the outer layer’s inner side. Ensure that the main bag strip is 7″*13″ while the bottom inner layer should be 5″ in diameter to fit snug with the stated outer fabric measurements.
Climbing Webbing: You need two strips of climbing webbing to make the best waist-belt loops. Here, the old climbing webbing is advisable, but you must ensure that they are not frayed.
Stopper/ Cord Lock: One cord lock is crucial to keep the bag closed when climbing and open effortlessly, while you need a layer of chalk across the palms and between the fingers. In this case, take care that the cord lock lets two cinch-cord lining passes through it. They are available at any sporting goods store.
Grommet: Grommets are a common fastener used in many applications, including fabrics and apparel. It is made of an elongated metal tube with a hole in the center; it fits over a hole on the other end.
The two ends are then connected with a small piece of metal called a washer to work as a circular passage for the thread cord to pass through. Find one in the same store.
Drawstring Cord: A cinch or drawstring cord is crucial for the smooth opening and closure mechanism. Here, a thread cord will be the best option as it can bear friction with the grommet and cord lock. Make sure that two strands of the target cord can easily pass through the grommet hole and stopper passage.
Large Eyelets: Large eyelets are not crucial, and a chalk bag can do without them, but to keep the cinch in its path, it works the finest. Two eyelets should suffice.
Sewing Equipment: Whereas you can hand-stitch a chalk bag with a suitable needle and thread, a sewing machine will do the task with expected refinedness. Not to ignore, the edges of the bag should be seamlessly stitched, and a sewing machine is perfect in this regard.
Easy-to-follow DIY Chalk Bag Steps
Start with the Outer fabric: Take your preferred fabric, cut a 14″*7″ strip for the bag’s main body, and cut a 6″ diameter strip for the bottom part. Now, fold the bigger part lengthwise and sew the ends together to form a tube with the inside facing out.
Then take the strip meant for the bottom and sew it onto the tube. Turn the tube inside out after the bottom is stitched efficiently to the main tube. Thus, the stitched edges will remain inside, and the outer fabric seams will look smoother.
Make a Hole & Set the Grommet: With the good side of the tube turned out, locate where to put the grommet to let the drawstring come and go through. Cut a whole sized smaller than the grommet.
Now, install the grommet properly. Make sure that the two parts of the gromet connect stubbornly. For max result, beat slightly with a small hammer or use a clutch to press the parts to fit tight.
Make the Liner Tube: Now, it’s time to make a tube with the fleece with the suggested bottom stitched. Repeat the same process you follow for the outer tube; this is no different. When done, put it into the outer layer-main body.
Set the Cord Lock onto the Cinch Cord: It’s time to set the stopper onto the cord. To do this, fold the cord to halve the length so that the cinch cord becomes a double-strand cord. Now, make a knot at the ends of the cord and pass the other end of the folded cord through the hole in the cord lock. The knot should not let the stopper fall off even if forced to.
Pass the Cinch Cord through the Grommet and Loop the Liner: Find the grommet in the main body of the bag to slip the cinch cord through it. Now, loop the cord around the inner fleece tube or the liner and put it inside the main bag.
Stitch the Webbing as Waist-loops: At this stage, you prefer the location of the waist-loop. Form a loop by folding the webbing and now slip the ends between the two layers – the bag and the liner.
Stitch the Liner Top with The Outer Fabric Folded Down: This is the crucial part to fold down the top edge of the main body to overlap the liner, at least up to the cord loop around the top of the inner fleece tube. Now, it’s time to sew the overlapped part, and thus the liner and the bag will be stitched, making a passage for the cinch cord to run along.
Thus, the cinch cord will close the tube top when drawn and open it when redrawn by unlocking the stopper. However, it will remain drawn with the stopper locked and released when smeared on the hands with the chalk kept inside the inner fleece tube.
Reminder: Do not find the answer to how to make a chalk bucket above, as they answer only to how to make a chalk bag. These two differ a lot and are meant for different types of sports. To simplify, a chalk bag is for climbing, while a chalk bucket is a chalk bag bouldering bigger in size and not meant for attaching to the body.

FAQs
Why are climbing chalk bags lined with fleece?
Climbing chalk bags are lined with fleece to help keep your hands warm. Climbing chalk is usually made of a fine powder that absorbs moisture from the air and can become difficult to grip when it’s cold outside. The fleece lining helps to keep the chalk warm, making it easier for you to grip the chalk and avoid making mistakes on your climb.
What are chalk bags made of?
Chalk bags are made from various materials, but the most popular is cloth. This cloth is usually a blend of cotton and polyester, and it’s treated with a water-repellent coating. The finished product has a strong, durable fabric that resists tears and rips.
The most popular climbing chalk bag material is fleece for the liner, while canvas, denim, and corduroy are preferred for the outer fabric. The outer fabric is important because it is the body proper of the bag and determines the chalk bag design, style, and color.
Do you put chalk straight into chalk bag?
Chalk can get messy, fast! If you’re putting chalk into your bag, break it up first so that it doesn’t clump together and get stuck in the cracks or crevices on your gear.
Can you wash a chalk bag?
Chalk bags can be a bit of a nuisance to wash. However, you can do a few things to keep them clean and healthy.
First, make sure the bag is completely dry before storing it away.
Second, avoid using harsh detergents or fabric softeners on your chalk bag – they will damage the cloth fibers and, eventually, the bag itself.
Finally, if the chalk starts staining or gathering dirt, use a mild soap and water solution to clean it off.
How long does climbing chalk last?
Climbing chalk is notorious for fading quickly, sometimes within minutes of use. Despite this, many climbers believe that chalk can last for hours or even days on a single rock climb. A few factors can affect how long the chalk will last: climber weight, type of climbing route, and the type of chalk used.
Chalk can crumble away quickly if exposed to too much friction (i.e., removing your chalk while climbing).
What chalk do pro climbers use?
Chalk is the essential tool of the professional climber. The soft, white powder provides a good grip when climbing and can be easily wiped off if it gets on your skin. There are many different types of chalk, but the most common is calcium carbonate. Pro climbers go with chalk available in a variety of brands, such as Metolius, La Sportiva, Black Diamond, and Petzl.
As for chalk form, you can choose from chalk balls and loose chalk. Chalk ball becomes preferable with time because it is less likely to spill.
What happens when climbing chalk gets wet?
Climbing chalk can become waterlogged when it is wet, and the friction between your hands and the rock causes it to stick. This makes it difficult to grip the rock, leading to falls. When climbing in wet conditions, bring extra chalk and warm up before starting your climb.
If you get the chalk too wet, let it dry out until it is no longer sticky. This can be done by rubbing your hands on a soft cloth or paper towel until no more chalk comes off.
Wrap Up
Now that you are reading the concluding part of this guide, you know pretty well how to make a chalk bag. Several tries should make you master the craft fully to make your custom climbing chalk bag with success.
However, make sure that the webbing between the fingers is coated properly and you are not overdoing the layering of chalk. Failure to do both or anyone will cut down on the desired friction.
You know the tricks of making a DIY chalk bag and how to use chalk to reap the max benefit. Rule the peaks, rocks, and boulders.